
Decorative Concrete Methods for Stunning Outdoor Spaces
- banace2494
- Feb 21
- 9 min read
Choosing decorative concrete for your Northern Virginia patio or foundation can lift your outdoor space from plain to striking. The right surface assessment and preparation directly impact how beautiful and resilient your results will be. By taking time for a structural-condition assessment and carefully matching methods to your unique property, you set the stage for a decorative concrete project that stands up to local weather and adds lasting value.
Table of Contents
Quick Summary
Main Point | Explanation |
1. Assess Surface Conditions First | Conduct a thorough visual and moisture inspection to identify any structural issues before applying decorative methods. |
2. Prioritize Area Preparation | Properly clear and prepare the area, ensuring a stable subgrade and adequate drainage to prevent future concrete problems. |
3. Match Technique to Surface Condition | Choose a decorative method based on the existing concrete condition, considering options like stains, overlays, and stamped concrete. |
4. Seal for Longevity | Apply a quality sealer to protect your decorative concrete from stains, moisture, and UV damage after complete curing. |
5. Respect Application Timing | Work efficiently during the application process, as many decorative techniques require precise timing to achieve optimal results. |
Step 1: Assess Existing Surfaces and Select Decorative Methods
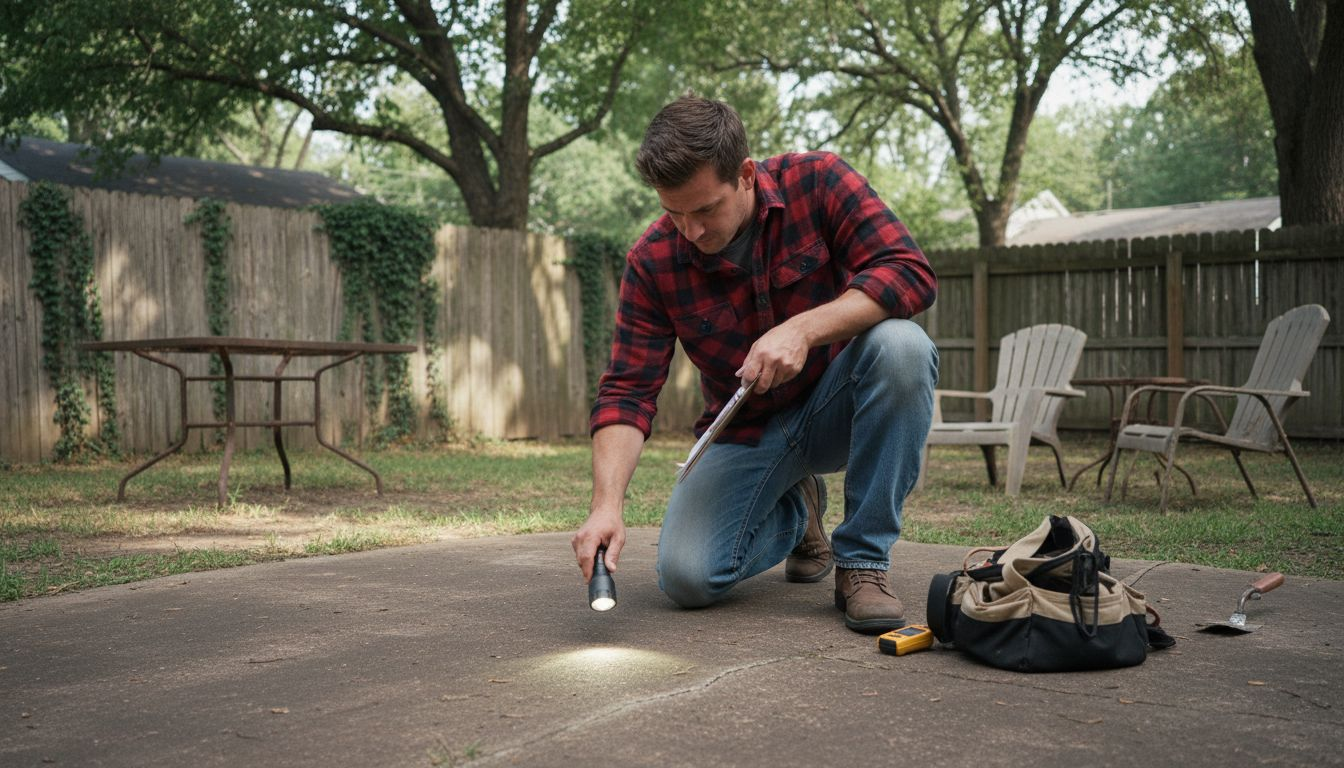
Before selecting decorative concrete methods, you need to understand what you’re working with. Your existing surface condition determines which techniques will deliver lasting results and which ones risk failure. A thorough assessment takes just a few hours but saves you money and frustration down the road.
Start with a visual inspection of your entire outdoor area. Look for cracks, spalling (flaking concrete), uneven settling, and surface discoloration. Walk across the patio or foundation and note any soft spots or areas where water pools. These observations reveal structural issues that decorative methods alone cannot fix.
Next, test for moisture problems. Moisture is the silent killer of decorative coatings and overlays. Wet concrete won’t accept stain, epoxy, or sealers properly. Perform a simple moisture test by taping a plastic sheet to the concrete and leaving it for 24 hours—if condensation appears underneath, you have moisture concerns that need addressing first.
Evaluate the structural condition of your concrete surface for cleanliness and integrity. Remove any loose debris, algae, or previous sealers. If you see deep cracks wider than 1/4 inch, these need repair before decorative application. Surface preparation accounts for 80% of decorative concrete success.
Once you understand your surface condition, match it to appropriate methods:
Stamped concrete: Works best on solid, crack-free foundations with no moisture issues
Concrete staining: Ideal for established surfaces with minor imperfections that add character
Epoxy coatings: Requires pristine, moisture-controlled surfaces for proper adhesion
Overlays: Perfect for repairing damaged areas while adding decorative appeal
Polished concrete: Best on structurally sound surfaces without active moisture problems
Consider your specific situation. Northern Virginia’s freeze-thaw cycles affect concrete durability, so methods that handle seasonal expansion matter. If your foundation shows age-related wear, resurfacing with concrete overlays might deliver better value than surface treatments alone.
Here’s how common decorative concrete methods compare in application difficulty, durability, and appearance:
Method | Application Difficulty | Durability | Typical Appearance |
Stamped Concrete | Moderate | High | Stone or brick patterns |
Concrete Staining | Easy | Moderate | Varied, mottled color tones |
Epoxy Coatings | Challenging | Very High | Glossy, seamless finish |
Overlays | Advanced | High | Custom textures and colors |
Polished Concrete | Moderate | High | Smooth, reflective sheen |
Honest assessment prevents expensive mistakes—spend time evaluating now rather than redoing work later.
Pro tip: Conduct your surface inspection on an overcast day—direct sunlight can hide moisture issues and make surface defects harder to spot accurately.
Step 2: Prepare the Area for Concrete Application
Proper area preparation is the foundation of any successful decorative concrete project. You’re creating the base that will support your patio or foundation for years to come. Skip this step, and you’ll face settling, cracking, and premature failure no matter how beautiful the finished surface looks.
Start by clearing the work zone completely. Remove vegetation, rocks, debris, and any existing surface material that needs replacement. If you’re working over an old patio, you may need to remove it entirely or grind it down. Clear at least two feet beyond your project boundaries to give yourself working space.
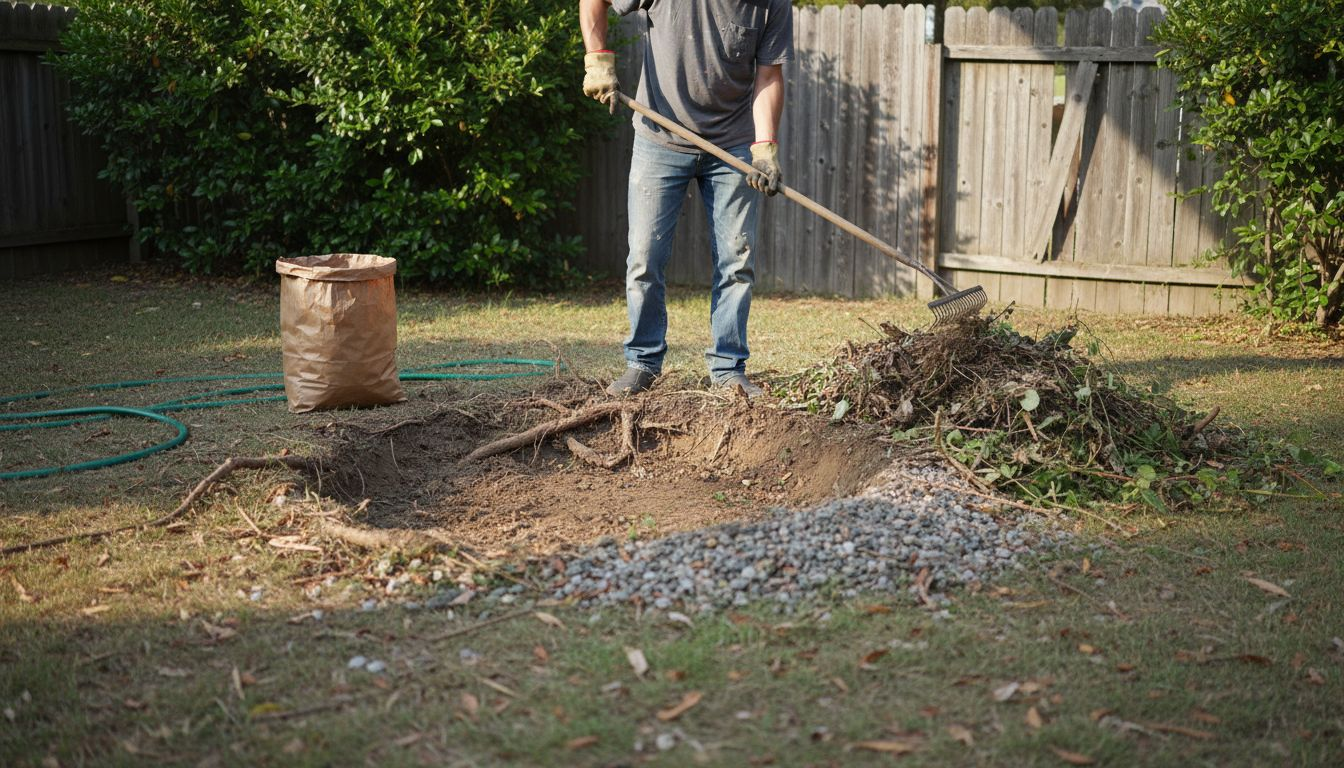
Next, focus on subgrade preparation. Excavate to the proper depth for your project type. The subgrade is the soil layer beneath everything, and it must be stable. Compact the soil firmly using a plate compactor or roller, working in multiple passes. Loose or uncompacted soil will settle unevenly, causing your new concrete to crack and shift.
Install a proper base layer using crushed stone or gravel. This typically means 4 to 6 inches of compacted base material. The base provides drainage and distributes load evenly across the subgrade. Compact this layer just as thoroughly as the soil below it. Proper base layering prevents water from pooling under your concrete and causing frost heave during Northern Virginia winters.
Address drainage and moisture control before pouring. Water sitting beneath concrete leads to damage and decorative coating failure. Slope your prepared area slightly away from structures, and consider installing drainage pipes or French drains if your property naturally holds water.
Before proceeding, verify these critical items:
Subgrade is firm and compacted
Base material is level and properly compacted
No standing water or soft spots remain
Forms are set correctly if you’re pouring new concrete
Weather forecast shows no rain for the next 48 hours
All reinforcement materials are ready and positioned
You’re now ready to install forms and set up reinforcement if pouring new concrete, or to apply your chosen decorative method to existing surfaces.
A solid, well-drained base eliminates 90% of concrete problems before they start.
Pro tip: Rent a plate compactor rather than trying to hand-tamp soil—mechanical compaction ensures uniform density and prevents future settling that would ruin your decorative finish.
Step 3: Apply Chosen Decorative Concrete Techniques
Now comes the creative part where your concrete transforms from plain to stunning. The application process varies significantly depending on your chosen method, but precision and timing are critical across all techniques. Work efficiently once you begin, as many decorative methods have narrow windows for application.
For stamped concrete, work quickly after the concrete is poured and reaches the right consistency. The concrete should be firm enough to hold the pattern but soft enough for stamps to sink in properly. Press stamps firmly and evenly across the surface, working in overlapping rows. Lift stamps straight up without twisting or dragging them sideways.
If you’re applying concrete stain, ensure the surface is completely clean and moisture-free first. Stain penetrates the concrete chemically, so proper surface preparation matters enormously. Apply stain with a sprayer or brush in thin, even coats. Multiple thin coats deliver better color than one heavy coat.
For epoxy or resin coatings, follow precise application timing and environmental controls to ensure proper adhesion and curing. Mix products according to manufacturer specifications. Apply with rollers or brushes, maintaining consistent thickness throughout. Temperature and humidity during application directly affect the finished result.
When working with decorative overlays, prepare the base coat carefully, then apply overlay material in thin layers. Trowel smoothly and create texture patterns while the material remains workable. Overlay application requires skill, as imperfect trowel work becomes visible once cured.
Key steps across all methods:
Maintain proper surface temperature (typically 50°F to 85°F)
Work in shade or provide temporary shade during hot days
Never apply decorative coatings in rain or high humidity
Follow cure times between coats or steps
Use quality tools appropriate for your chosen method
Timing and environmental conditions separate mediocre results from exceptional ones. Most decorative concrete professionals recommend working early morning or late afternoon when temperatures are moderate and weather is most stable.
The difference between a beautiful finish and a failed project often comes down to respecting drying and curing times.
Pro tip: Have all your tools, materials, and equipment ready and organized before you start—once you begin application, you cannot stop midway without creating visible seams or inconsistencies in your decorative finish.
Step 4: Seal and Finish for Lasting Protection
Sealing your decorative concrete is not optional—it’s the difference between a beautiful surface that lasts decades and one that deteriorates in a few years. A quality sealer protects against staining, UV fading, moisture infiltration, and wear from foot traffic. Think of it as insurance for your investment.
Before sealing, allow the concrete to cure completely according to your chosen decorative method. For most techniques, this means waiting 28 days after application. The concrete must be completely dry and clean, free of dust, dirt, and any residue from the decorative process.
Clean the surface thoroughly using a pressure washer set to moderate pressure. High pressure can damage the decorative finish, while low pressure may not remove embedded dirt. After pressure washing, allow the concrete to dry completely before proceeding. Some contractors wait an additional 24 to 48 hours to ensure all moisture has evaporated.
Choose the right sealer type based on exposure conditions. Penetrating sealers work well for stamped and stained concrete because they let the surface breathe while protecting from moisture. Film-forming sealers create a protective barrier suitable for high-traffic areas. Consider your specific location—Northern Virginia’s freeze-thaw cycles demand sealers rated for cold climates.
For best results, match sealer types to decorative finishes and exposure needs:
Sealer Type | Best For | Main Advantage |
Penetrating Sealer | Stamped/stained areas | Breathes, resists moisture |
Film-Forming Sealer | Epoxy/overlays | High shine, easy cleaning |
Acrylic Sealer | Moderate climates | UV resistance, fast dry |
Apply sealer according to manufacturer instructions. Most sealers require thin, even coats applied with a sprayer or roller. Multiple thin coats outperform one thick coat. Allow proper drying time between coats, typically 4 to 24 hours depending on the product.
Final sealing steps include:
Apply first coat and allow full drying time
Apply second coat for optimal protection
Stay off the surface for 24 to 48 hours after final coat
Plan resealing every 2 to 5 years depending on traffic and climate
Schedule regular cleaning to maintain appearance
Your decorative concrete now stands protected against the elements, ready to showcase its beauty for years to come.
A sealed surface maintains its color, prevents staining, and extends the life of your decorative concrete by years.
Pro tip: Apply sealer on a dry day with temperatures between 50°F and 85°F—avoid sealing before rain or in direct sunlight, as both conditions interfere with proper curing and adhesion.
Transform Your Outdoor Space with Expert Decorative Concrete Solutions
Creating a stunning outdoor space means addressing the key challenges of surface condition, moisture control, and durable finishing that we discussed in the article. At BNTS Construction, we specialize in mastering these critical steps with services like stamped concrete, custom patios, and foundational work tailored for Northern Virginia’s unique climate. Whether you are concerned about cracks, moisture issues, or need a decorative overlay, our team understands how to prevent costly mistakes and deliver lasting beauty.

Ready to elevate your outdoor living area with expert craftsmanship and proven decorative methods? Visit BNTS Construction to explore our full range of concrete services including stamped concrete and masonry work. Don’t wait until a small problem turns into an expensive repair—contact us now to schedule your assessment and start transforming your outdoor spaces with confidence.
Frequently Asked Questions
What decorative concrete method is best for my outdoor space?
Consider the condition of your existing concrete and the look you want to achieve. For example, stamped concrete is ideal for solid, crack-free surfaces, while overlays are perfect for repairing damaged areas and enhancing appearance. Assess your foundation first before making a selection.
How do I prepare my area for decorative concrete application?
Start by completely clearing the work zone of vegetation, debris, and any old surface material. Next, ensure you properly prepare the subgrade by compacting the soil and installing a base layer of compacted gravel to prevent settling and cracking in your new concrete.
How should I maintain my decorative concrete after installation?
Regular maintenance of your decorative concrete involves cleaning and resealing every 2 to 5 years, depending on foot traffic and exposure conditions. Plan to clean the surface thoroughly and reapply sealer as needed to protect against staining and wear.
What steps are critical to apply decorative concrete techniques successfully?
Timely and precise application is key when applying decorative techniques like stamped concrete or coatings. Prepare the surface, work efficiently after mixing materials, and adhere to drying and curing times to ensure a beautiful and lasting finish.
How do I test for moisture problems before decorative concrete application?
To identify moisture issues, tape a plastic sheet to your concrete and leave it for 24 hours. If condensation forms underneath, you need to address moisture concerns before applying any decorative methods to avoid failure down the line.
Recommended
Comments